Sew a Bunny Bib with the Cricut Maker

Hey Guys!
I've been playing around with the Cricut Maker even more. During this last week, I decided to try turning one of my patterns into a cut file specifically for the Maker! You can find my bunny bib pattern for free here. If you're quick you can whip one up for Easter coming up. The Cricut Maker would make it even quicker though!! I ended up making 3... ;)

CLICK HERE FOR THE ORIGINAL FREE PATTERN AND TUTORIAL
I used my Bunnies and Blossoms fabric that's now available in stores and online for all 3 of the bibs.


How to make the cut/write files in Design Maker
(Click on the images to enlarge them on your screen for your reference.)
You can download all the files here to use within Design Space. They will be in a .zip file, in .png format, and I split the files up into 4 parts as follows:
DOWNLOAD FILES
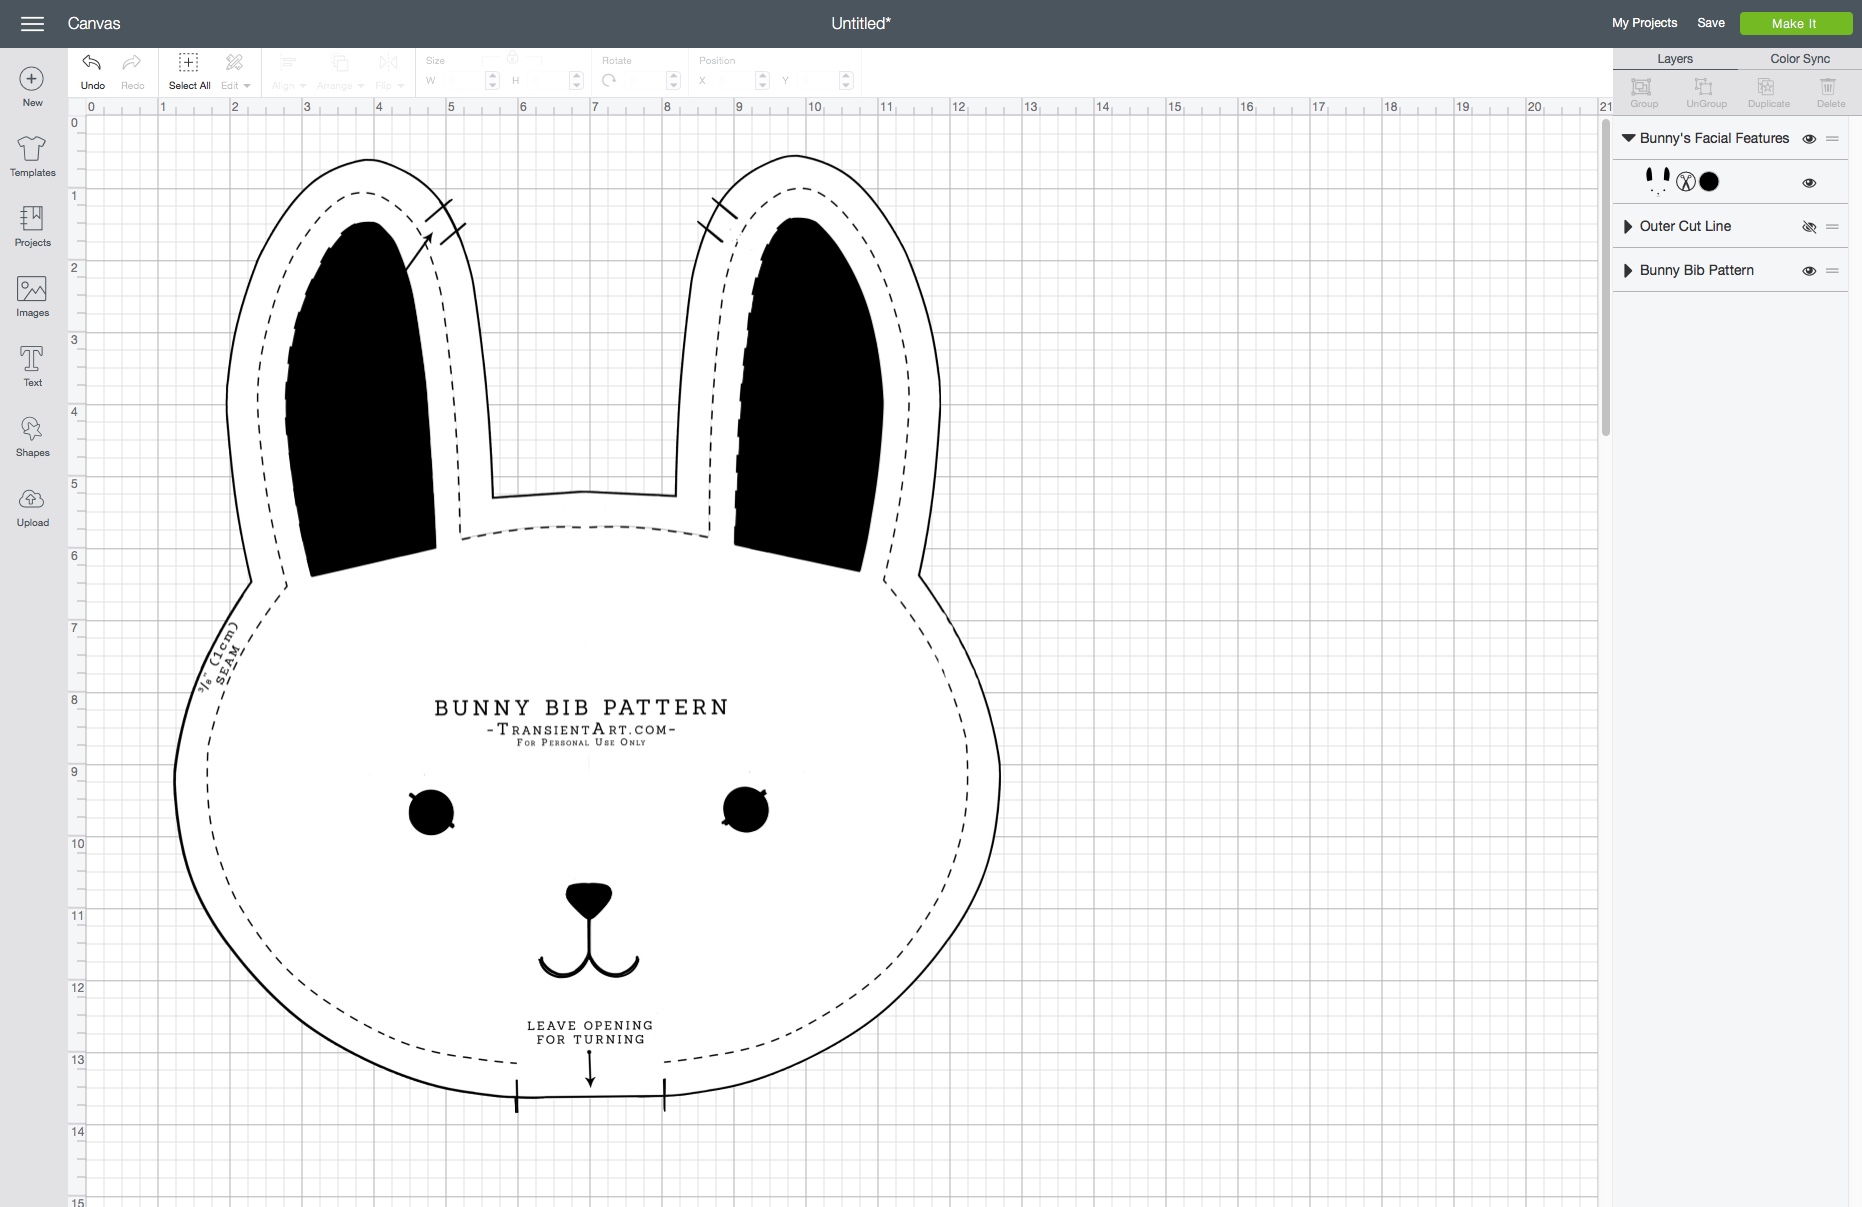
The 'Outer Cut Line.'

The 'Bunny's Facial Features.'

The 'Stitch Line.'

Then the complete 'Bunny Bib Pattern' to use as a template.

We'll be combining the 'Outer Cut Line' with the 'Bunny's Facial Features' and then with the 'Stitch Line' to create 2 files on the canvas within Design Space.
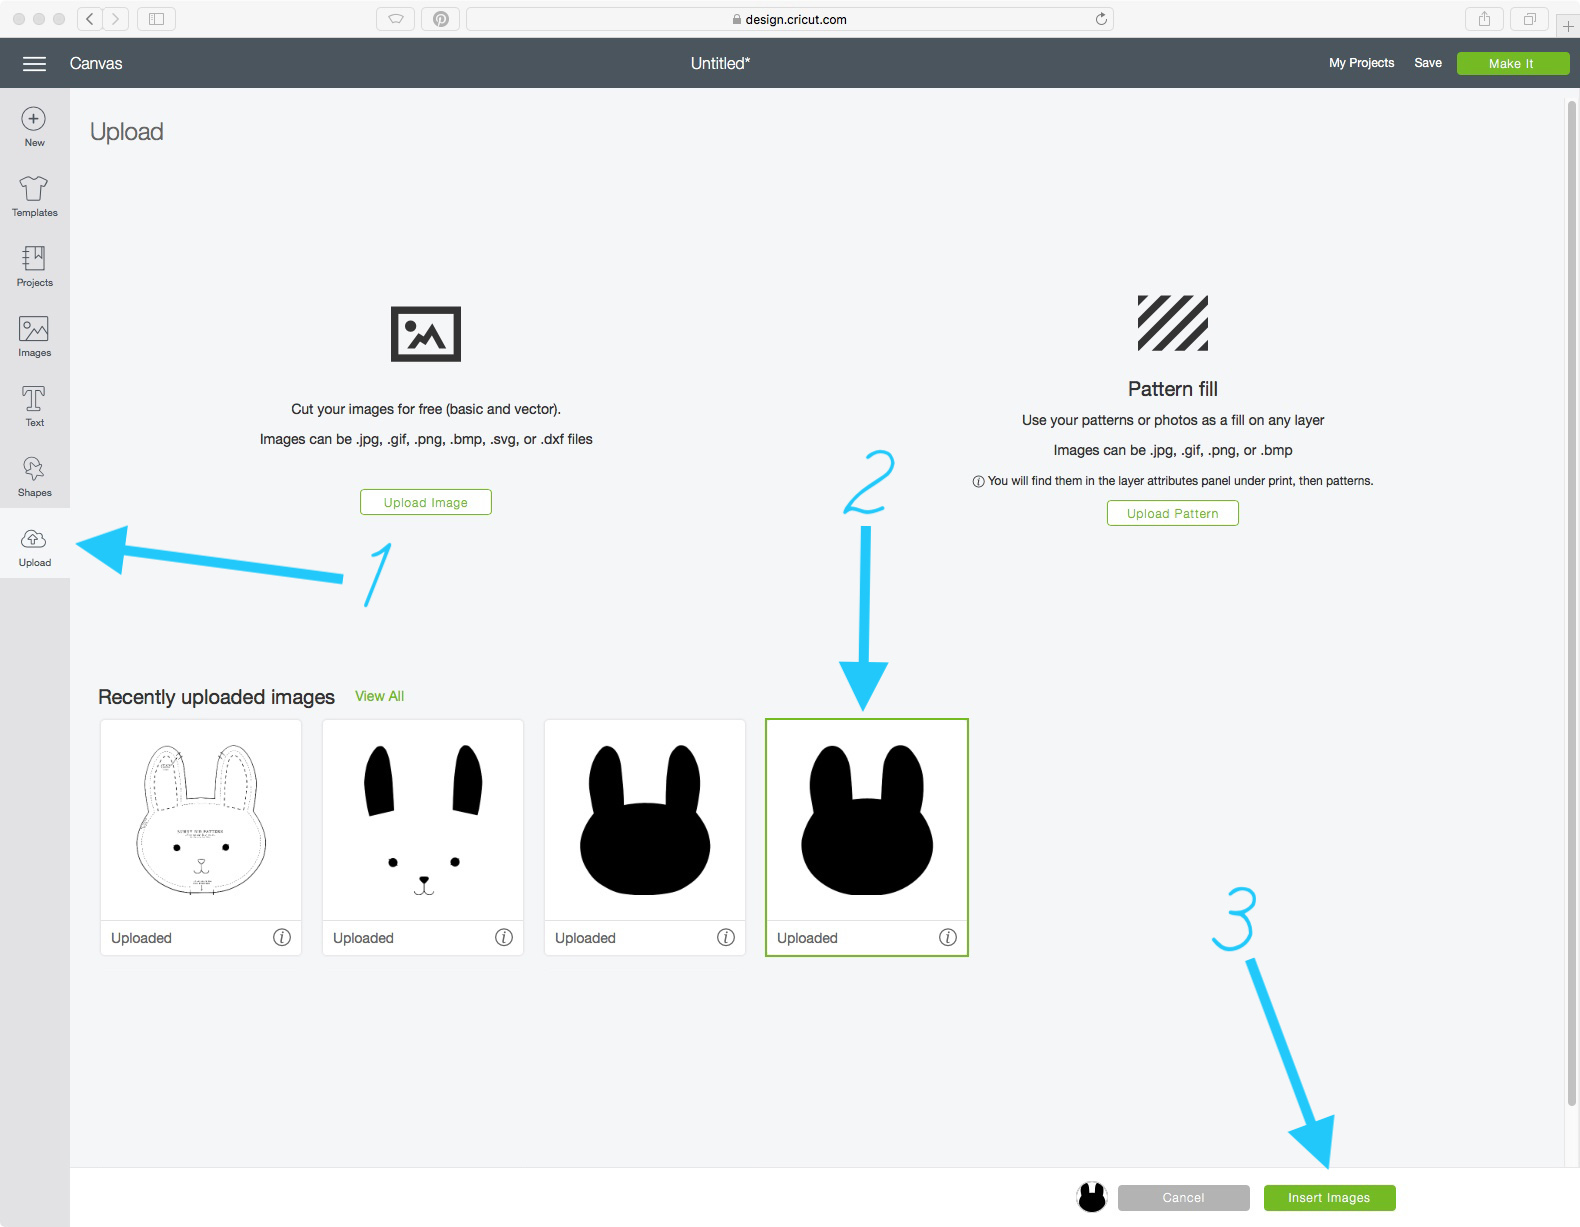
1. Upload to Design Space
After you've downloaded the files, go ahead and upload them to Design Space. Select 'Complex' for the main Bunny Bib Pattern and hit continue> continue> save as print then cut image> save. Select 'Simple' for the rest and hit continue> continue> save as cut image> save.
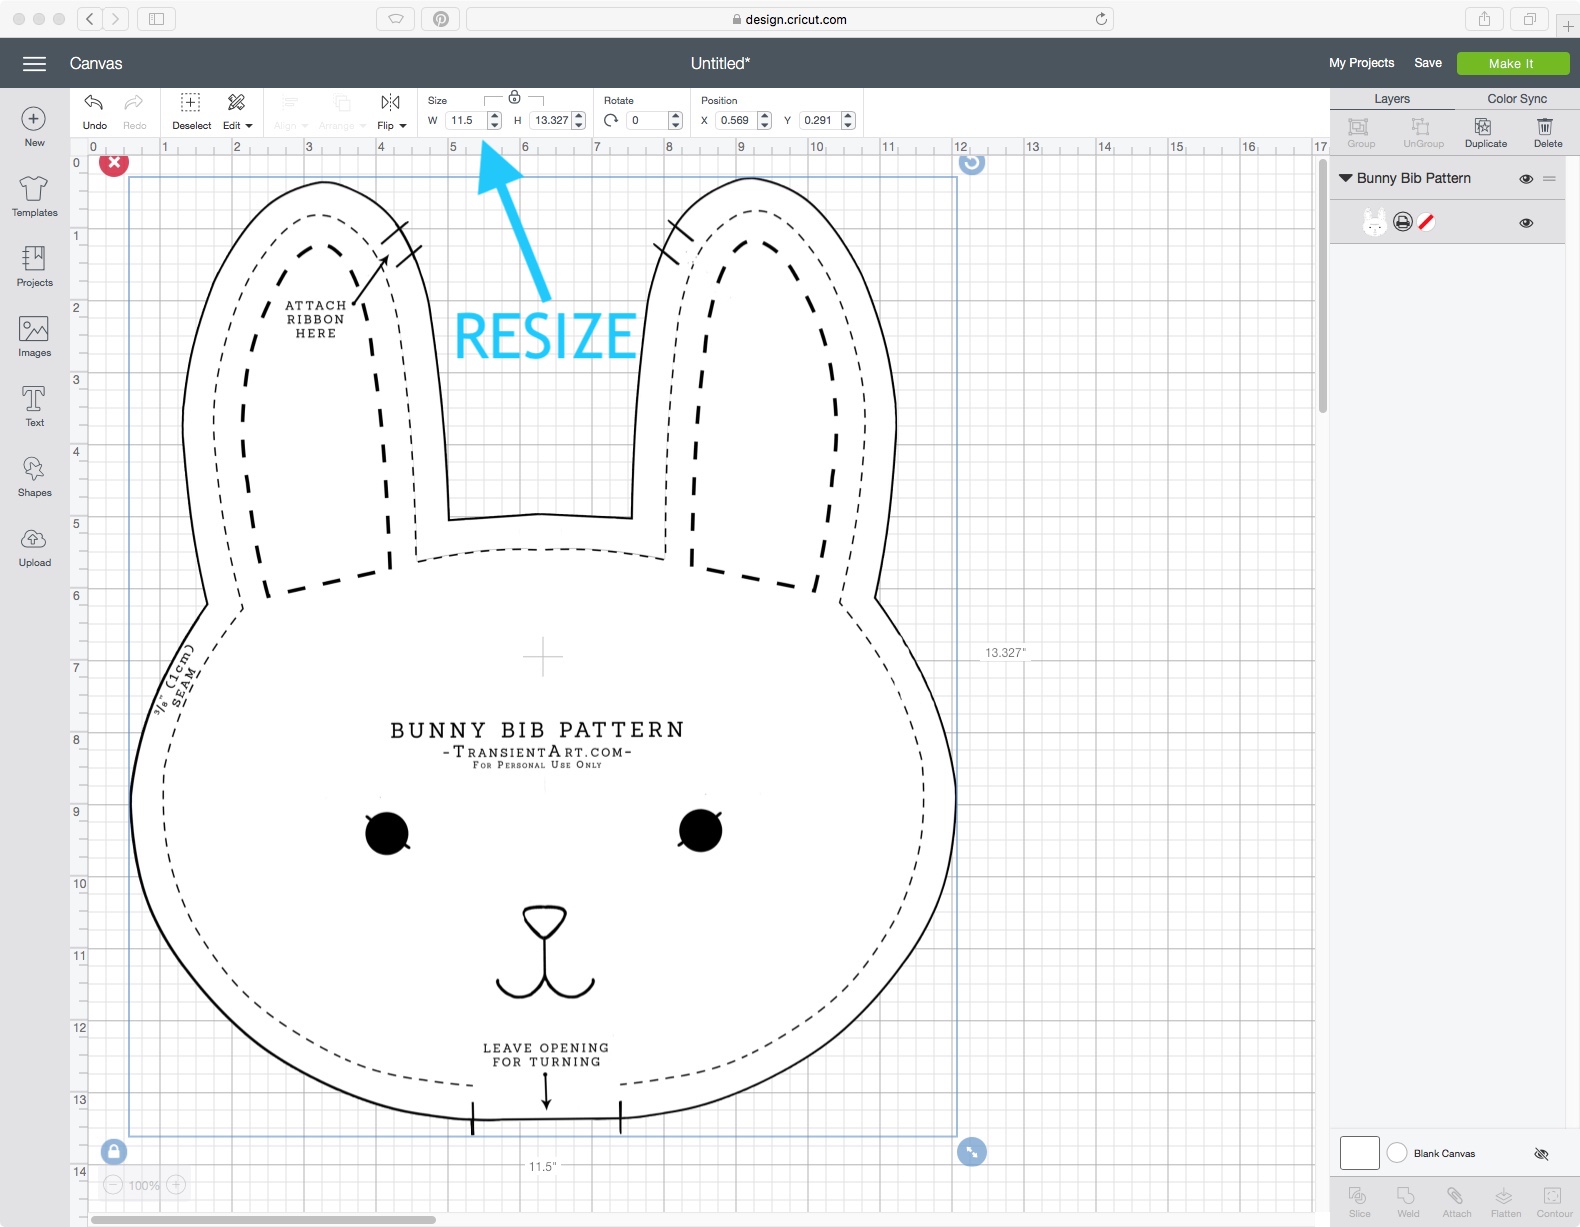
2. Insert the Bunny Bib Pattern and resize it to be 11.5" wide by 13.327" tall
Create a new project by clicking 'New' in the top left-hand corner. Click the upload button and select the bunny Bib Pattern to insert it onto the canvas. Resize it to 11.5" wide. (You can resize this to be 11.5" tall instead to make the bib fit on a 12" x 12" mat, the bib will obviously be smaller and would be better suited for a newborn. I think that the size of this bib works well for a baby of any age.)
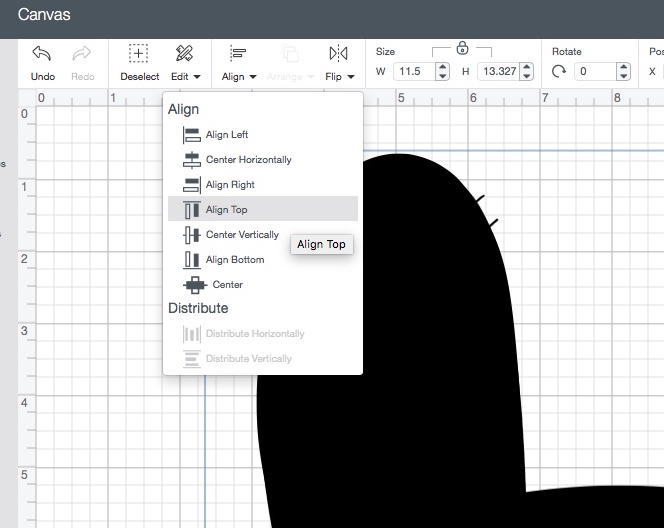
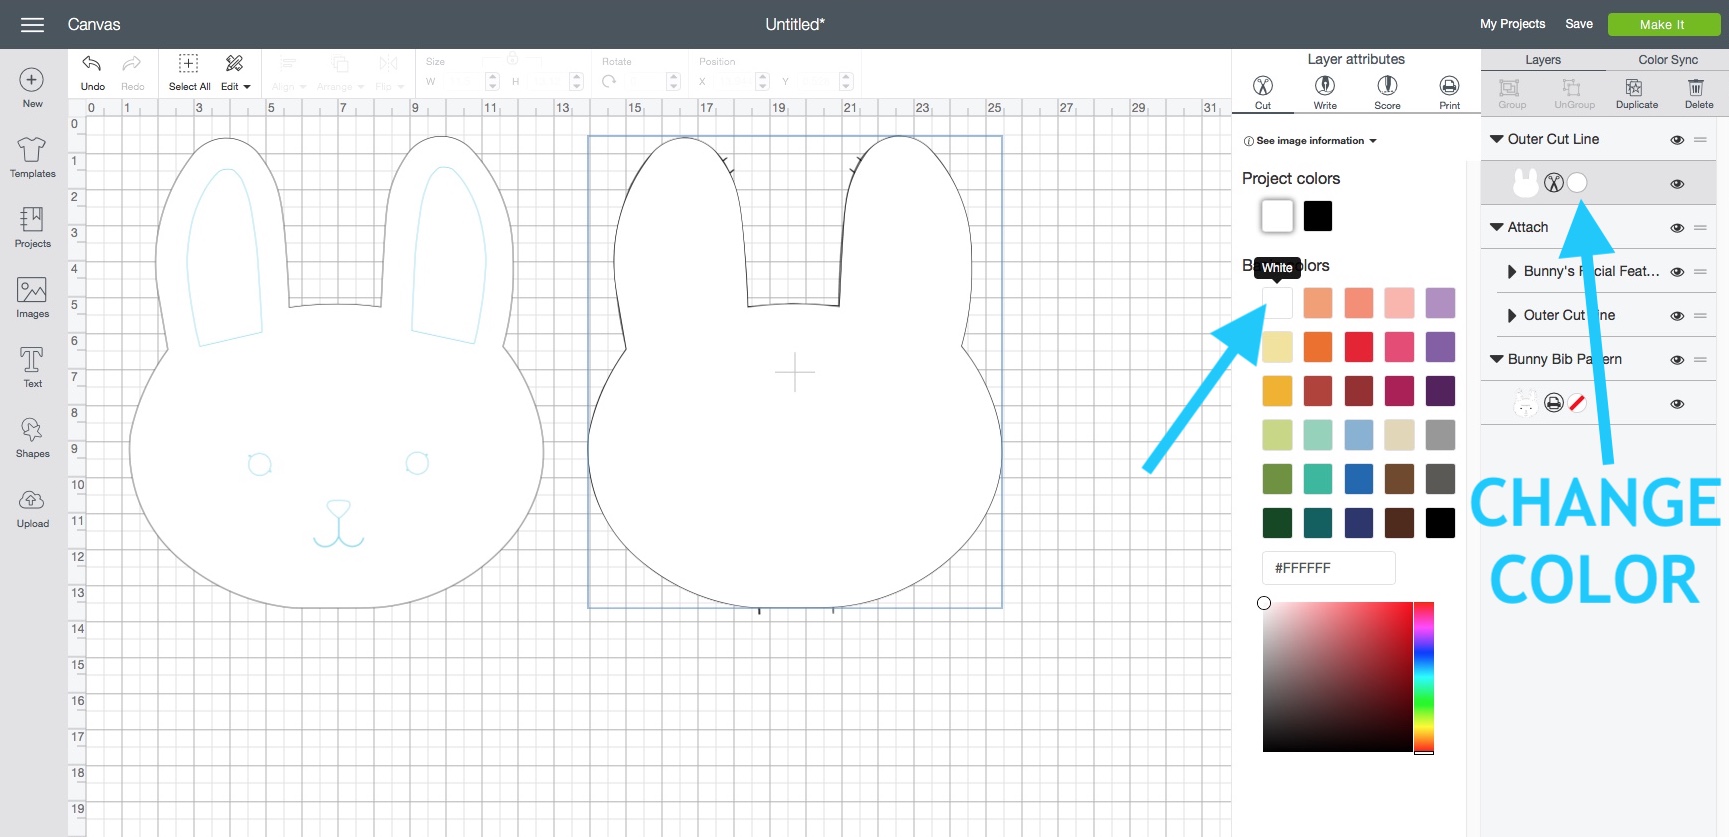
3. Insert the 'Outer Cut Line' file
Resize it to 11.5" wide and then line it up above the 'Bunny Bib Pattern'. Select both layers and Align > Top then Align > Center Horizontally. Click on the little black circle by the scissors on the 'Outer Cut Panel' to change the color of the bunny.

4. Click upload and insert the 'Bunny's Facial Features'
Resize it to 8.3" wide by 10.565" tall. Click the little eyeball on the 'Outer Cut Line' to hide it temporarily and manually line up the 'Bunny's Facial Features.' Zoom in with the - and + signs in the bottom left-hand corner on the canvas if you need to as you work.
5. Change 'Facial Features' from 'Cut' to 'Write'
Next we will tell it to 'write' and not 'cut' the 'Bunny's Facial Features'. On the layers panel, click the Bunny Facial Features layer > click the little scissors icon > change the layer attributes to write and pick the blue 'Washable Fabric Pen' in the choices. The lines of the 'Facial Features' should turn blue to indicate this change.

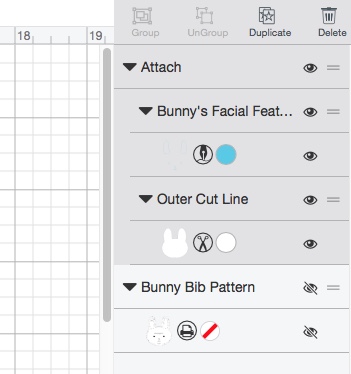
6. Attach the 'Outer Cut Line' and 'Facial Features' Layers Together
Click the little eye to turn visibility of the 'Outer Cut Line' layer on and select it and the 'Bunny's Facial Features' layer (hold down shift when clicking on both to select both) and align > center horizontally. Adjust the layers until they match up with the main pattern if need be. Turn off visibility on the 'Bunny Bib Pattern' by clicking the little eye. Select both the layers again and 'Attach' them together with the attach button at the bottom of the layers panel.

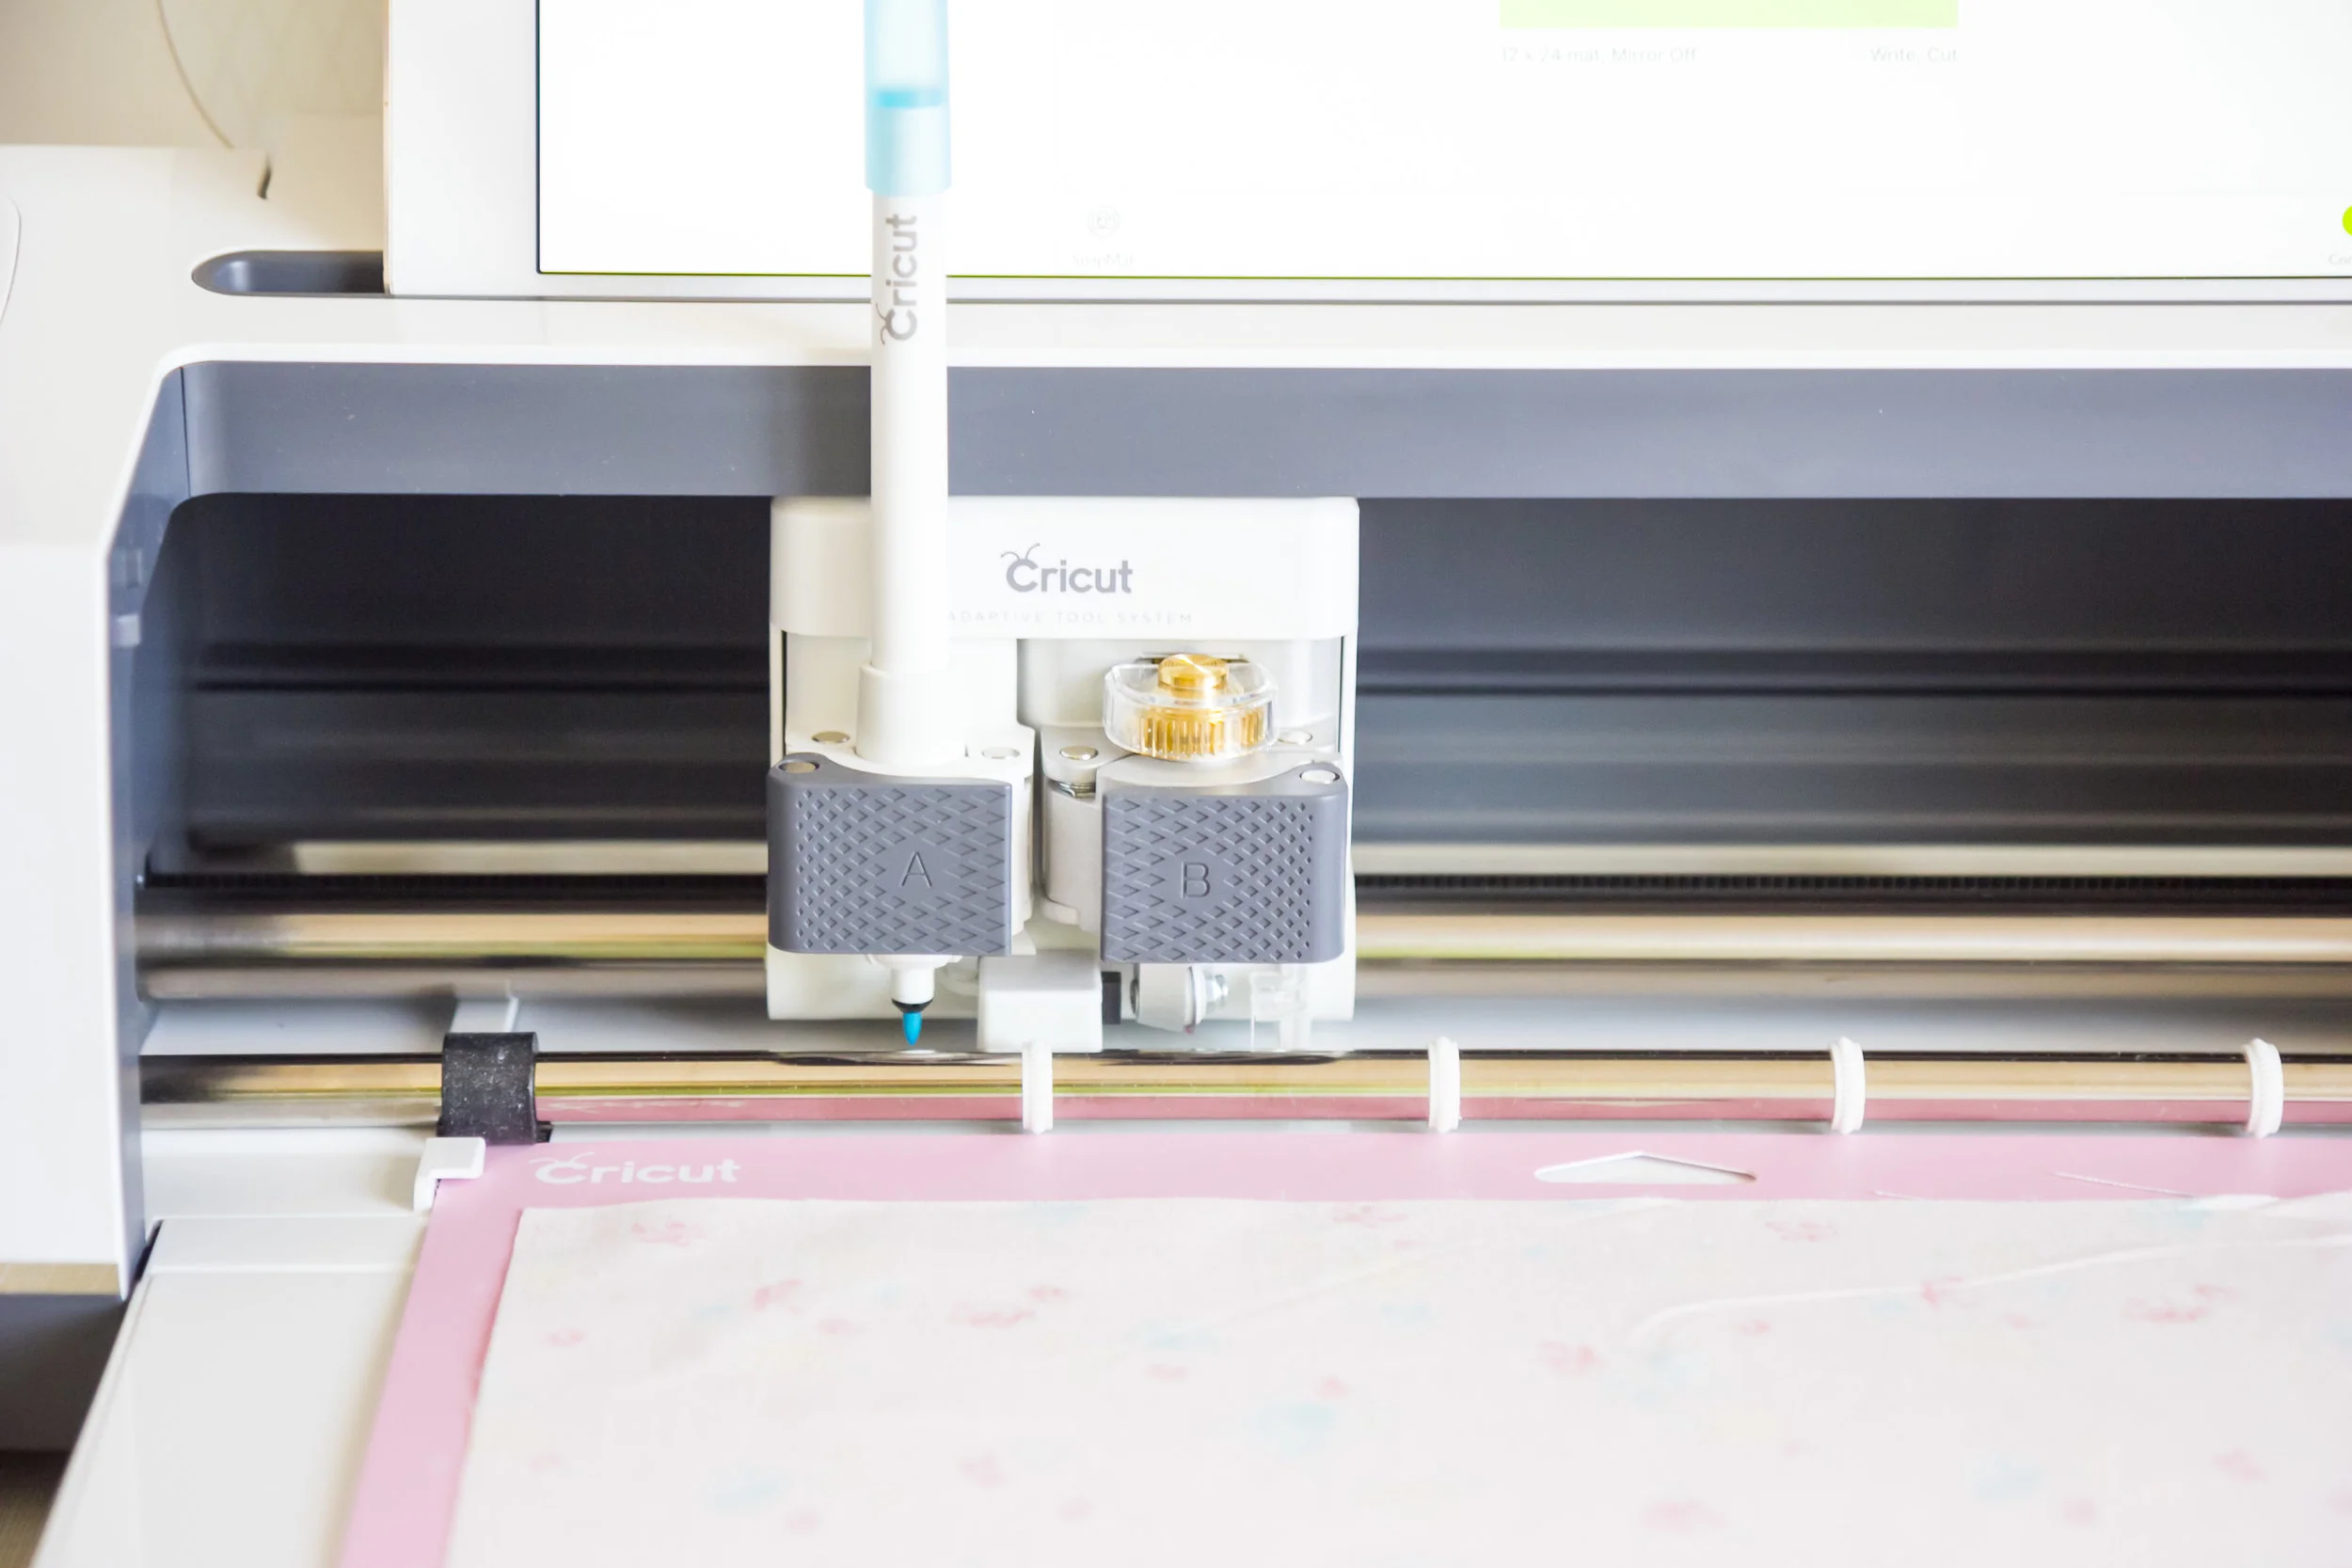
Your two layers should now indicate that they're attached together. Now one cut/write file is done. When we go to perform this first cut, the Maker will also draw on the fabric too.
This will be used on the cotton fabric for the front of the bunny bib.
Time for the second cut/write file. We will be doing the same things as the first step essentially.
This file will be cutting and drawing the stitch line on the batting. (I only had Insul-Bright on me when making the 3 bunny bibs for this tutorial and forgot to have it 'write' for me when you see the picture below later)
7. Reinsert another 'Outer Cut Line'
Move the main template over to the side by turning the little eyes off an on while moving, and reinsert another 'Outer Cut Line' and aline it up horizontally after resizing it to 11.5" wide. Go ahead and change the color to any color you'd like. I chose white.
8. Insert the 'Stitch Line' and line it up to match.
Change the 'Stitch Line' layer from 'cut' to 'write' with the fabric marker option selected like in Step 5. Change the size to 10.57" by wide 12.19" tall and turn off 'Outer Cut Line' visibility so you can line up the 'Stitch Line.'
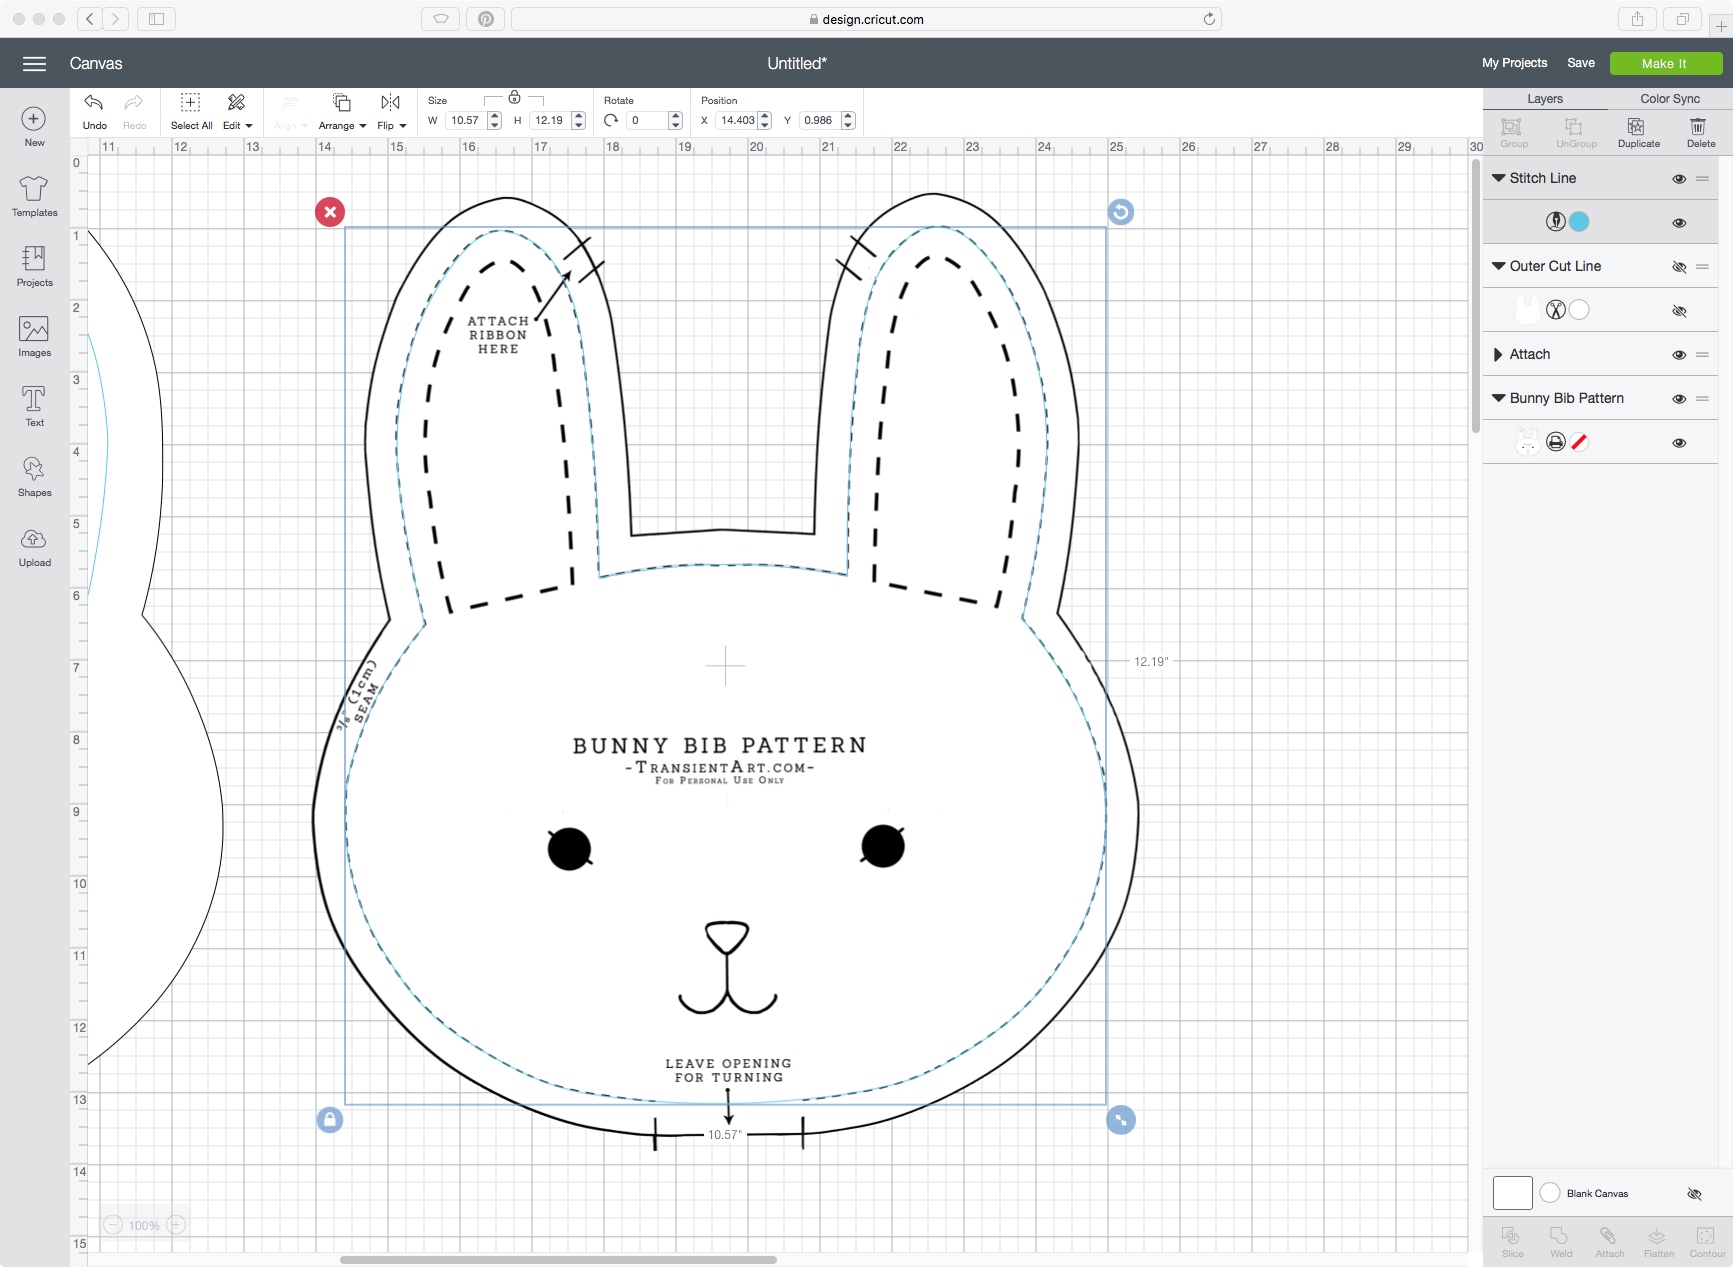
9. Add 6 lines- the start/stop points, and where to attach ribbons
Select the shapes tab on the left side and select the 'score line.'
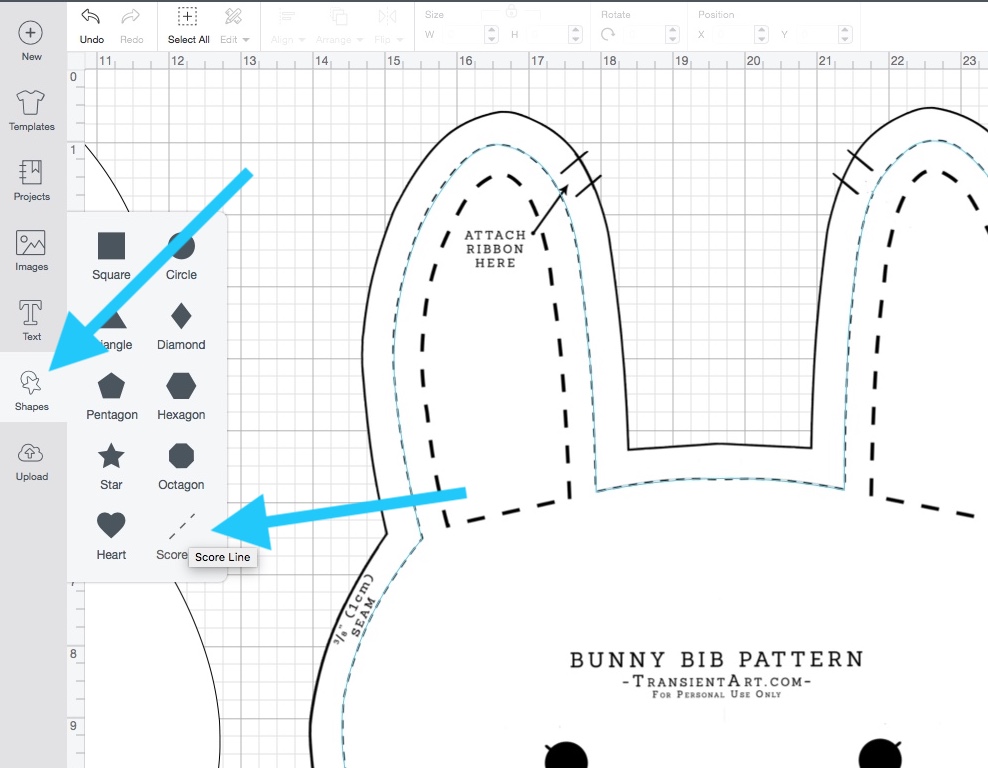
I've found the score line shows up on the left side of the canvas and can be a little hard to spot. Change it to 'write' with fabric marker selected.

Copy this line so you can easily paste it and work from there lining them up with the pattern. When pasting the new line will show up a short distance away and have the circle commands for it appear too. Rotate and change the size to make the write lines line up on the pattern.

10. Attach the two layers together
Go ahead and delete the "Bunny Bib Pattern' layer from the canvas by selecting it and clicking the little red X in the top corner, you can always reinsert it if you need it again. Turn on visibility for the 'Outer Cut Line.' Select both layers ('Outer Cut Line' and 'Stitch Line') and 'Attach' them together.

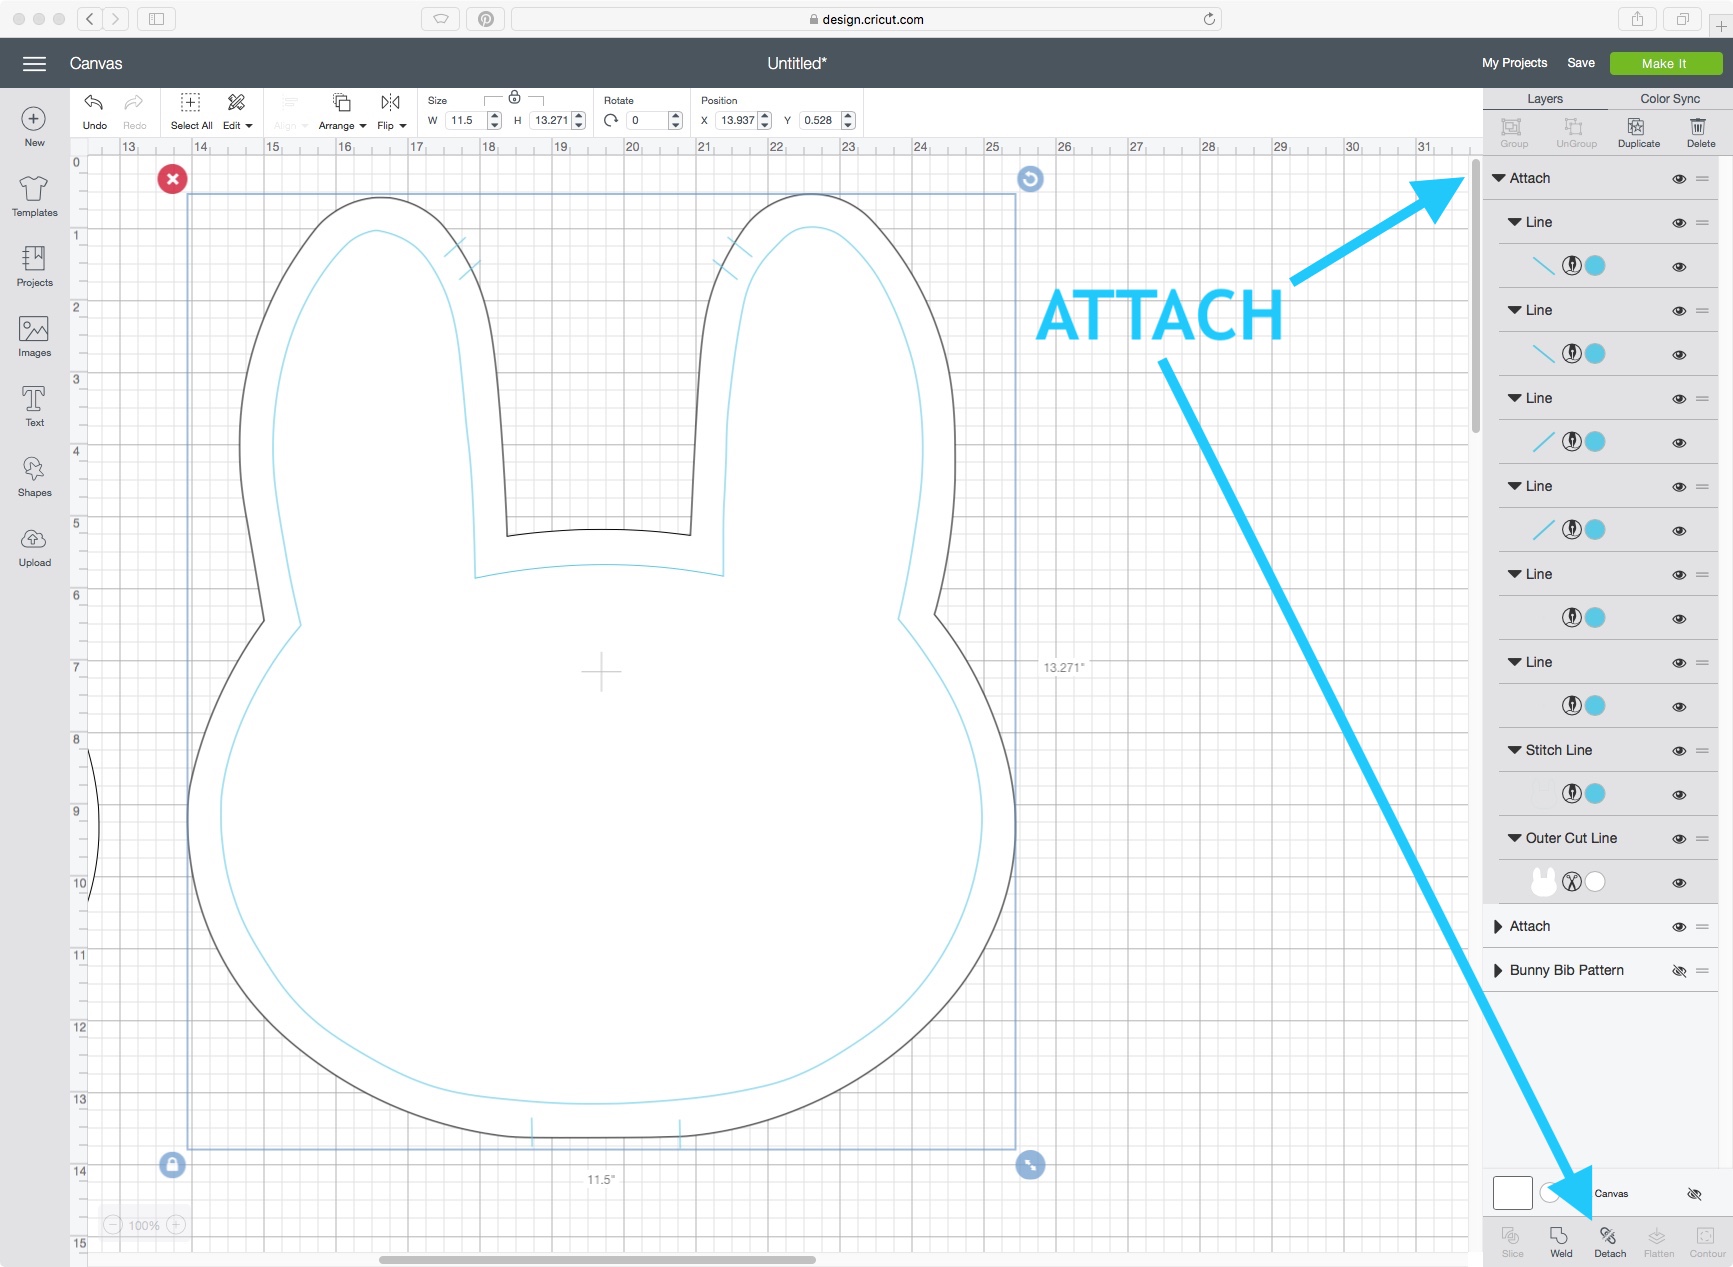
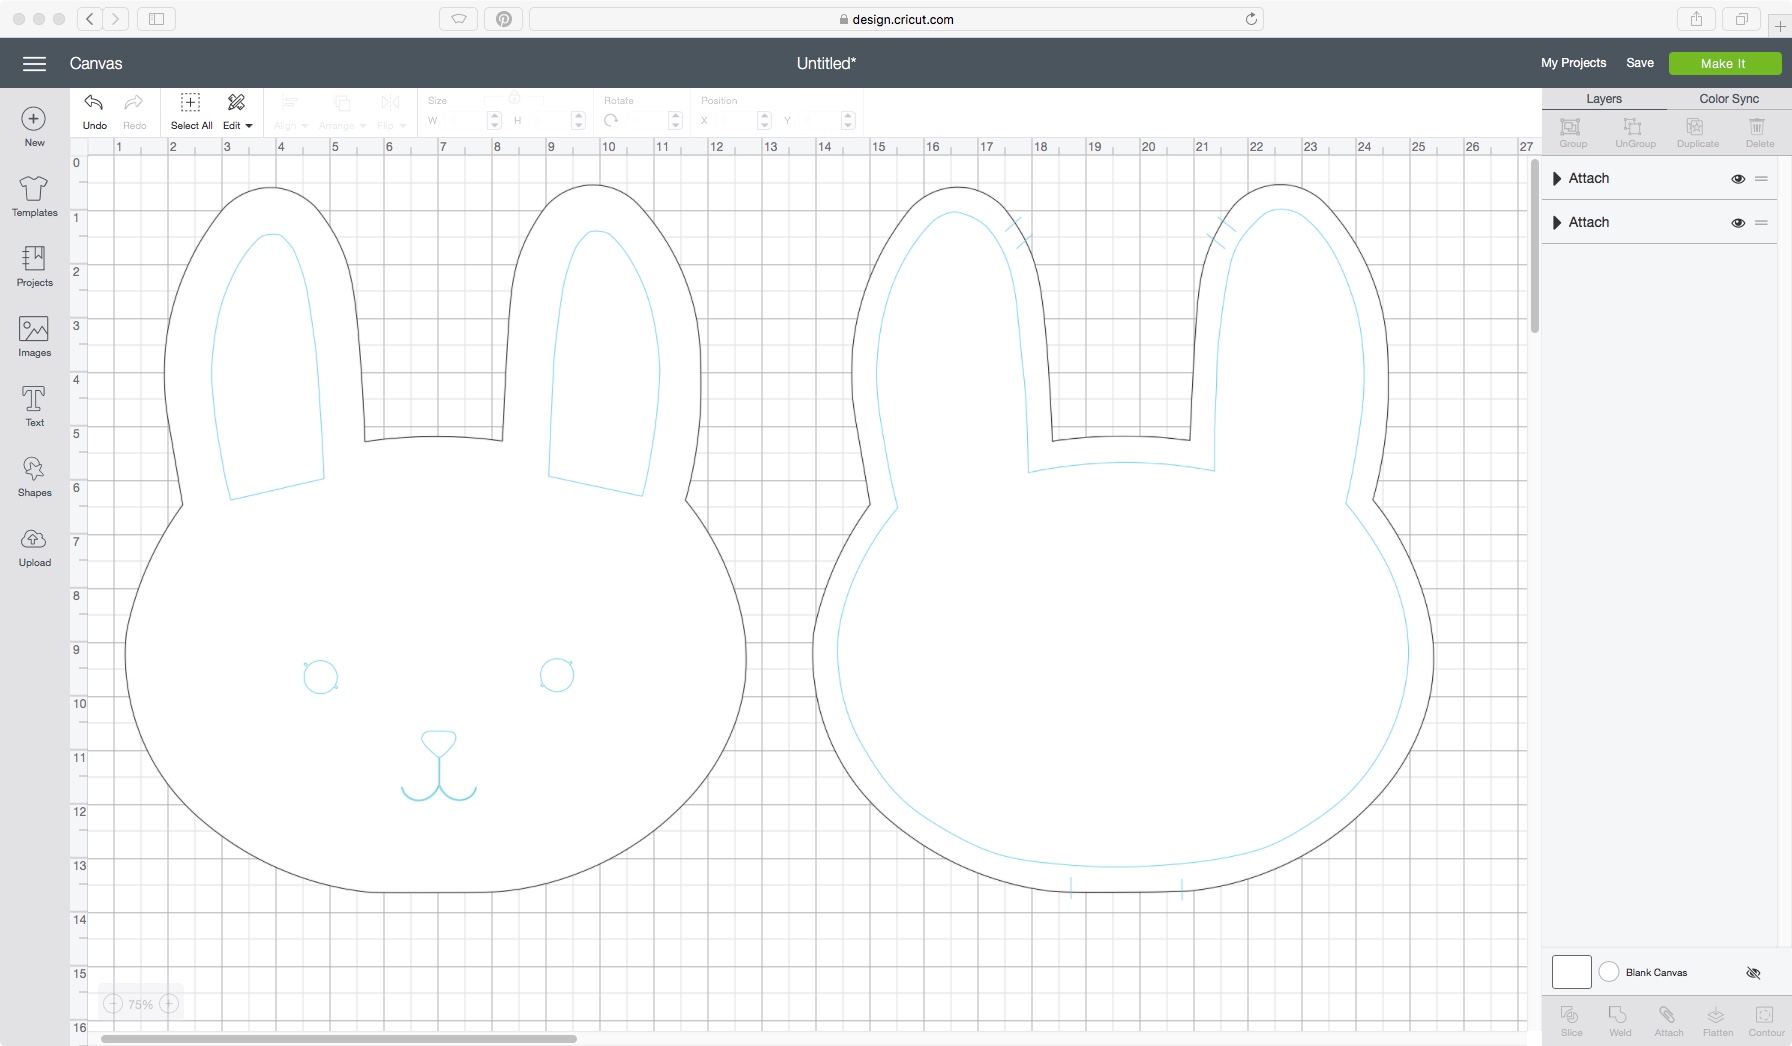
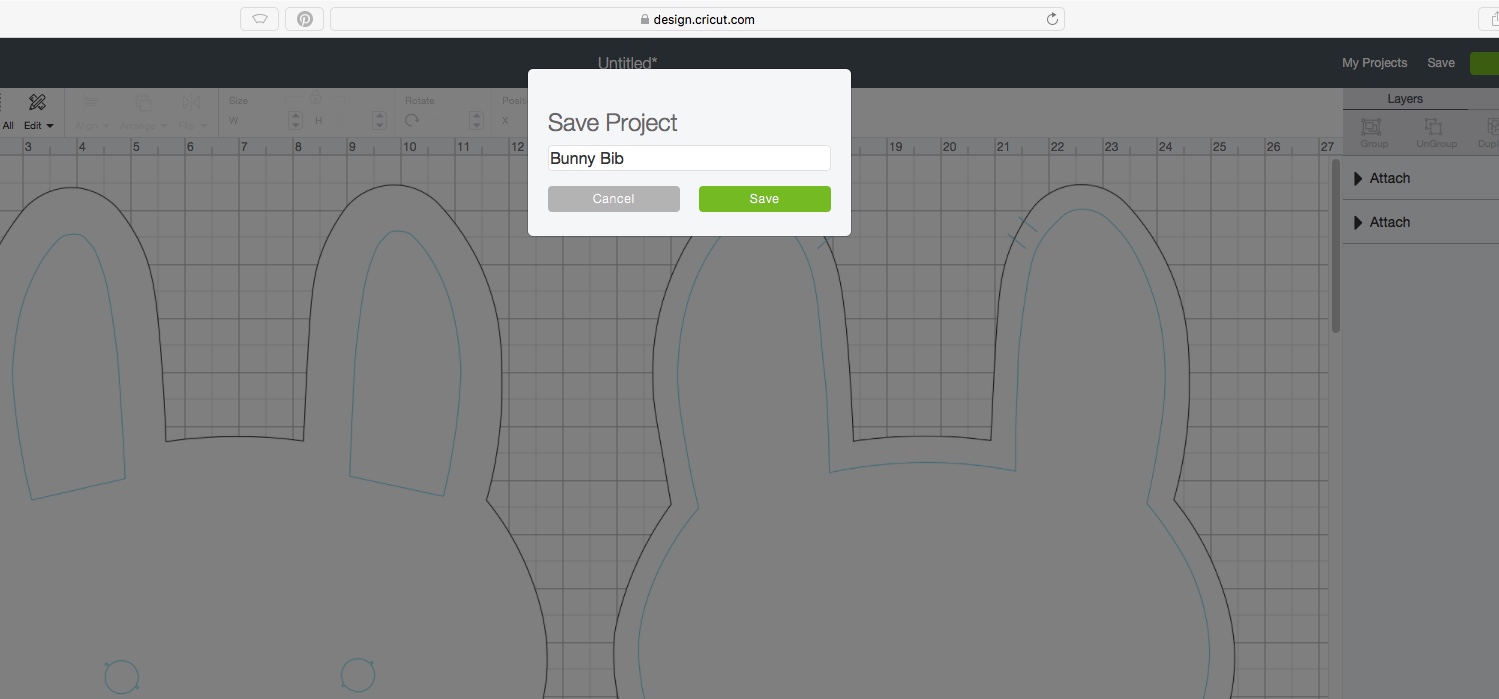
You should now have two layers 'Attach' layers in your layers panel and two cut/write bunny bib templates on your canvas. Save your project, title it Bunny Bib. Now it's time to make it!
Click the green 'Make It' button in the top corner. It'll show on the left-hand side the 2 mats you'll need to prepare. Load up your fabric on the mat and hit continue, making sure your machine is connected. Design Space will automatically sort what on your canvas to fit the mat the best it can. Below you can see our bunny images were sorted into two mats, making two cut jobs. Mat 1 will be for the batting, and mat 2 will be for the cotton.
Select 'Cotton' and follow the prompts from there.
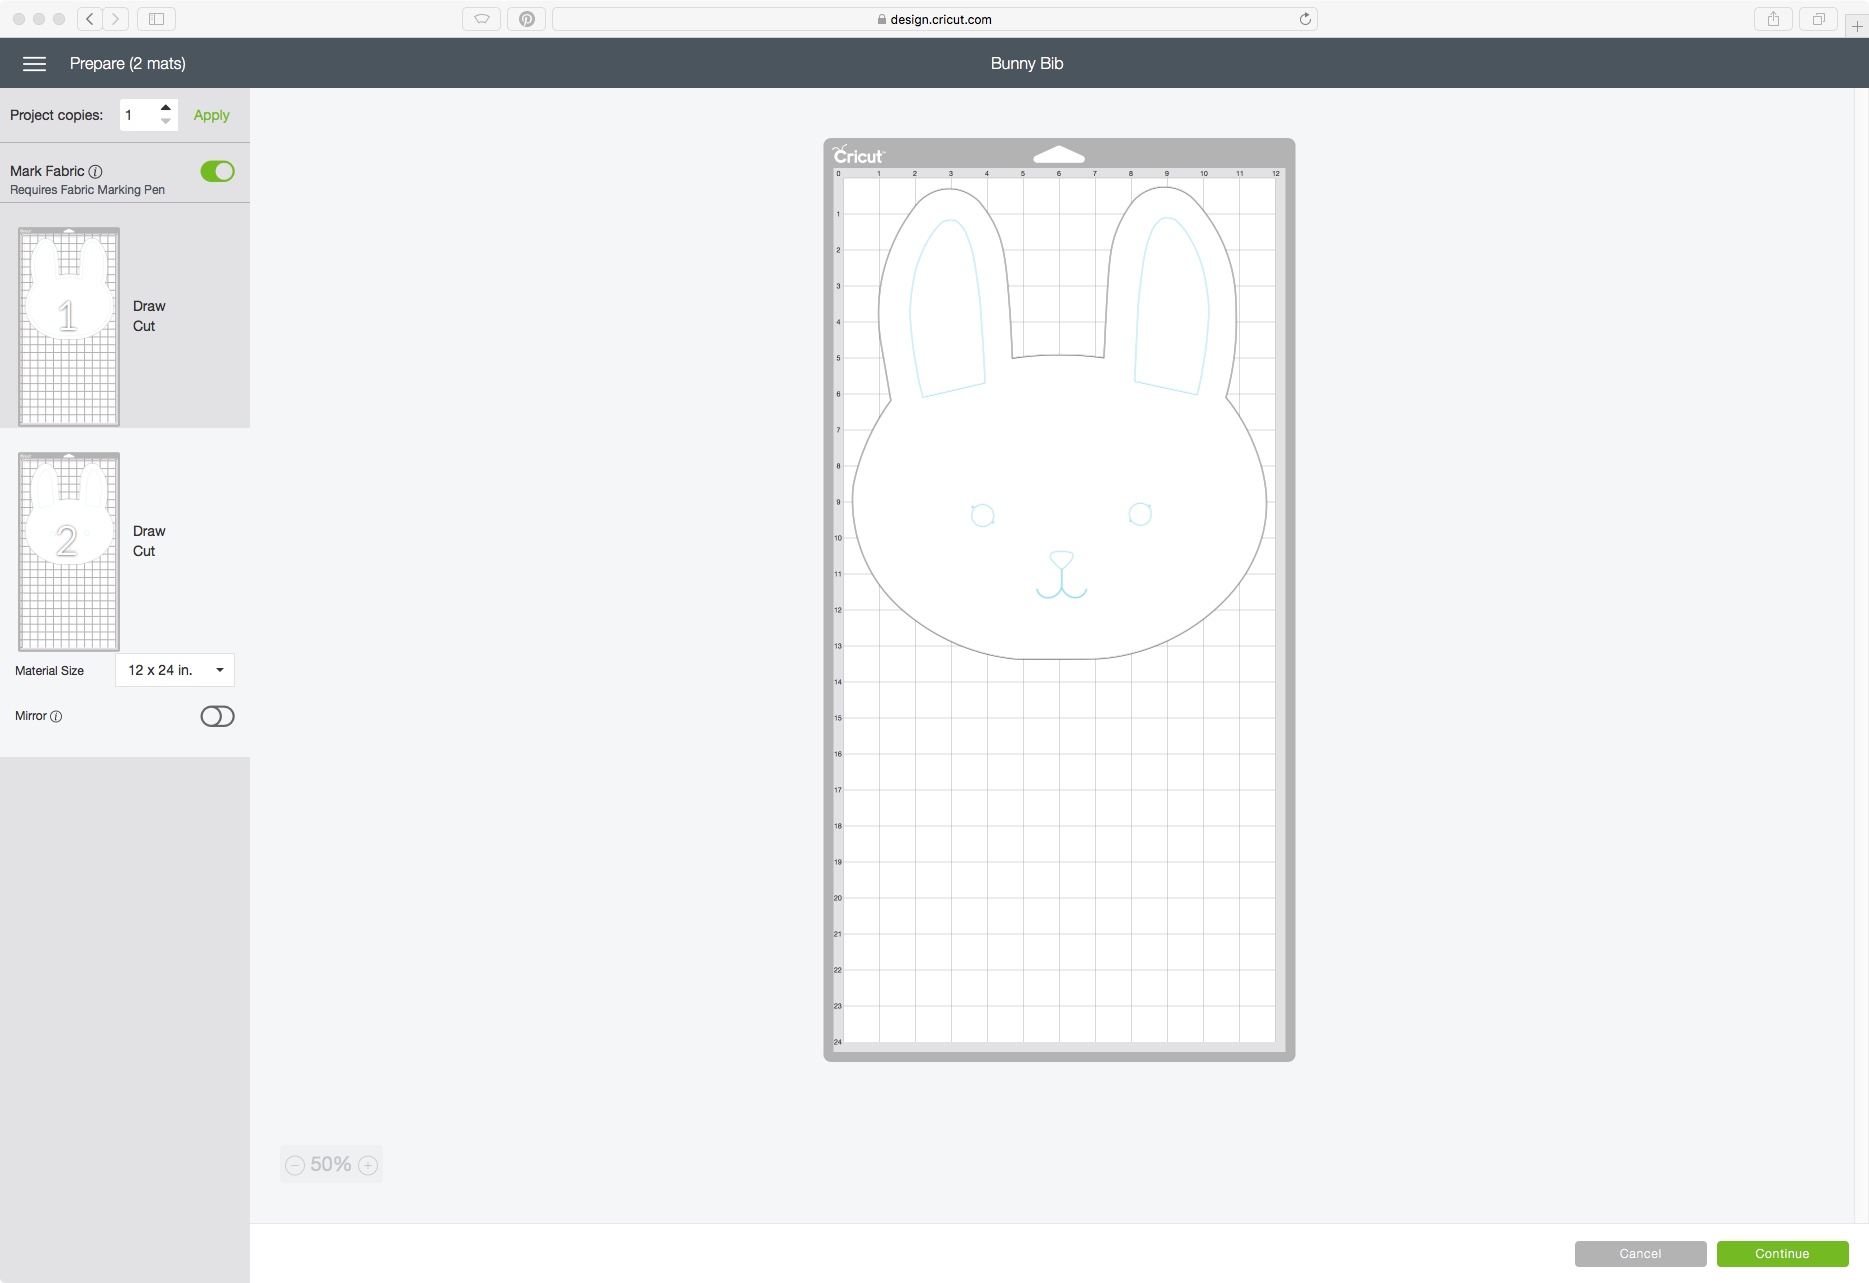
For the second mat, load up your batting, select 'heavy fabric' and cut/write from there. (In my picture below I forgot to attach my layers and have it write at the same time for me when I was first working on this pattern.)


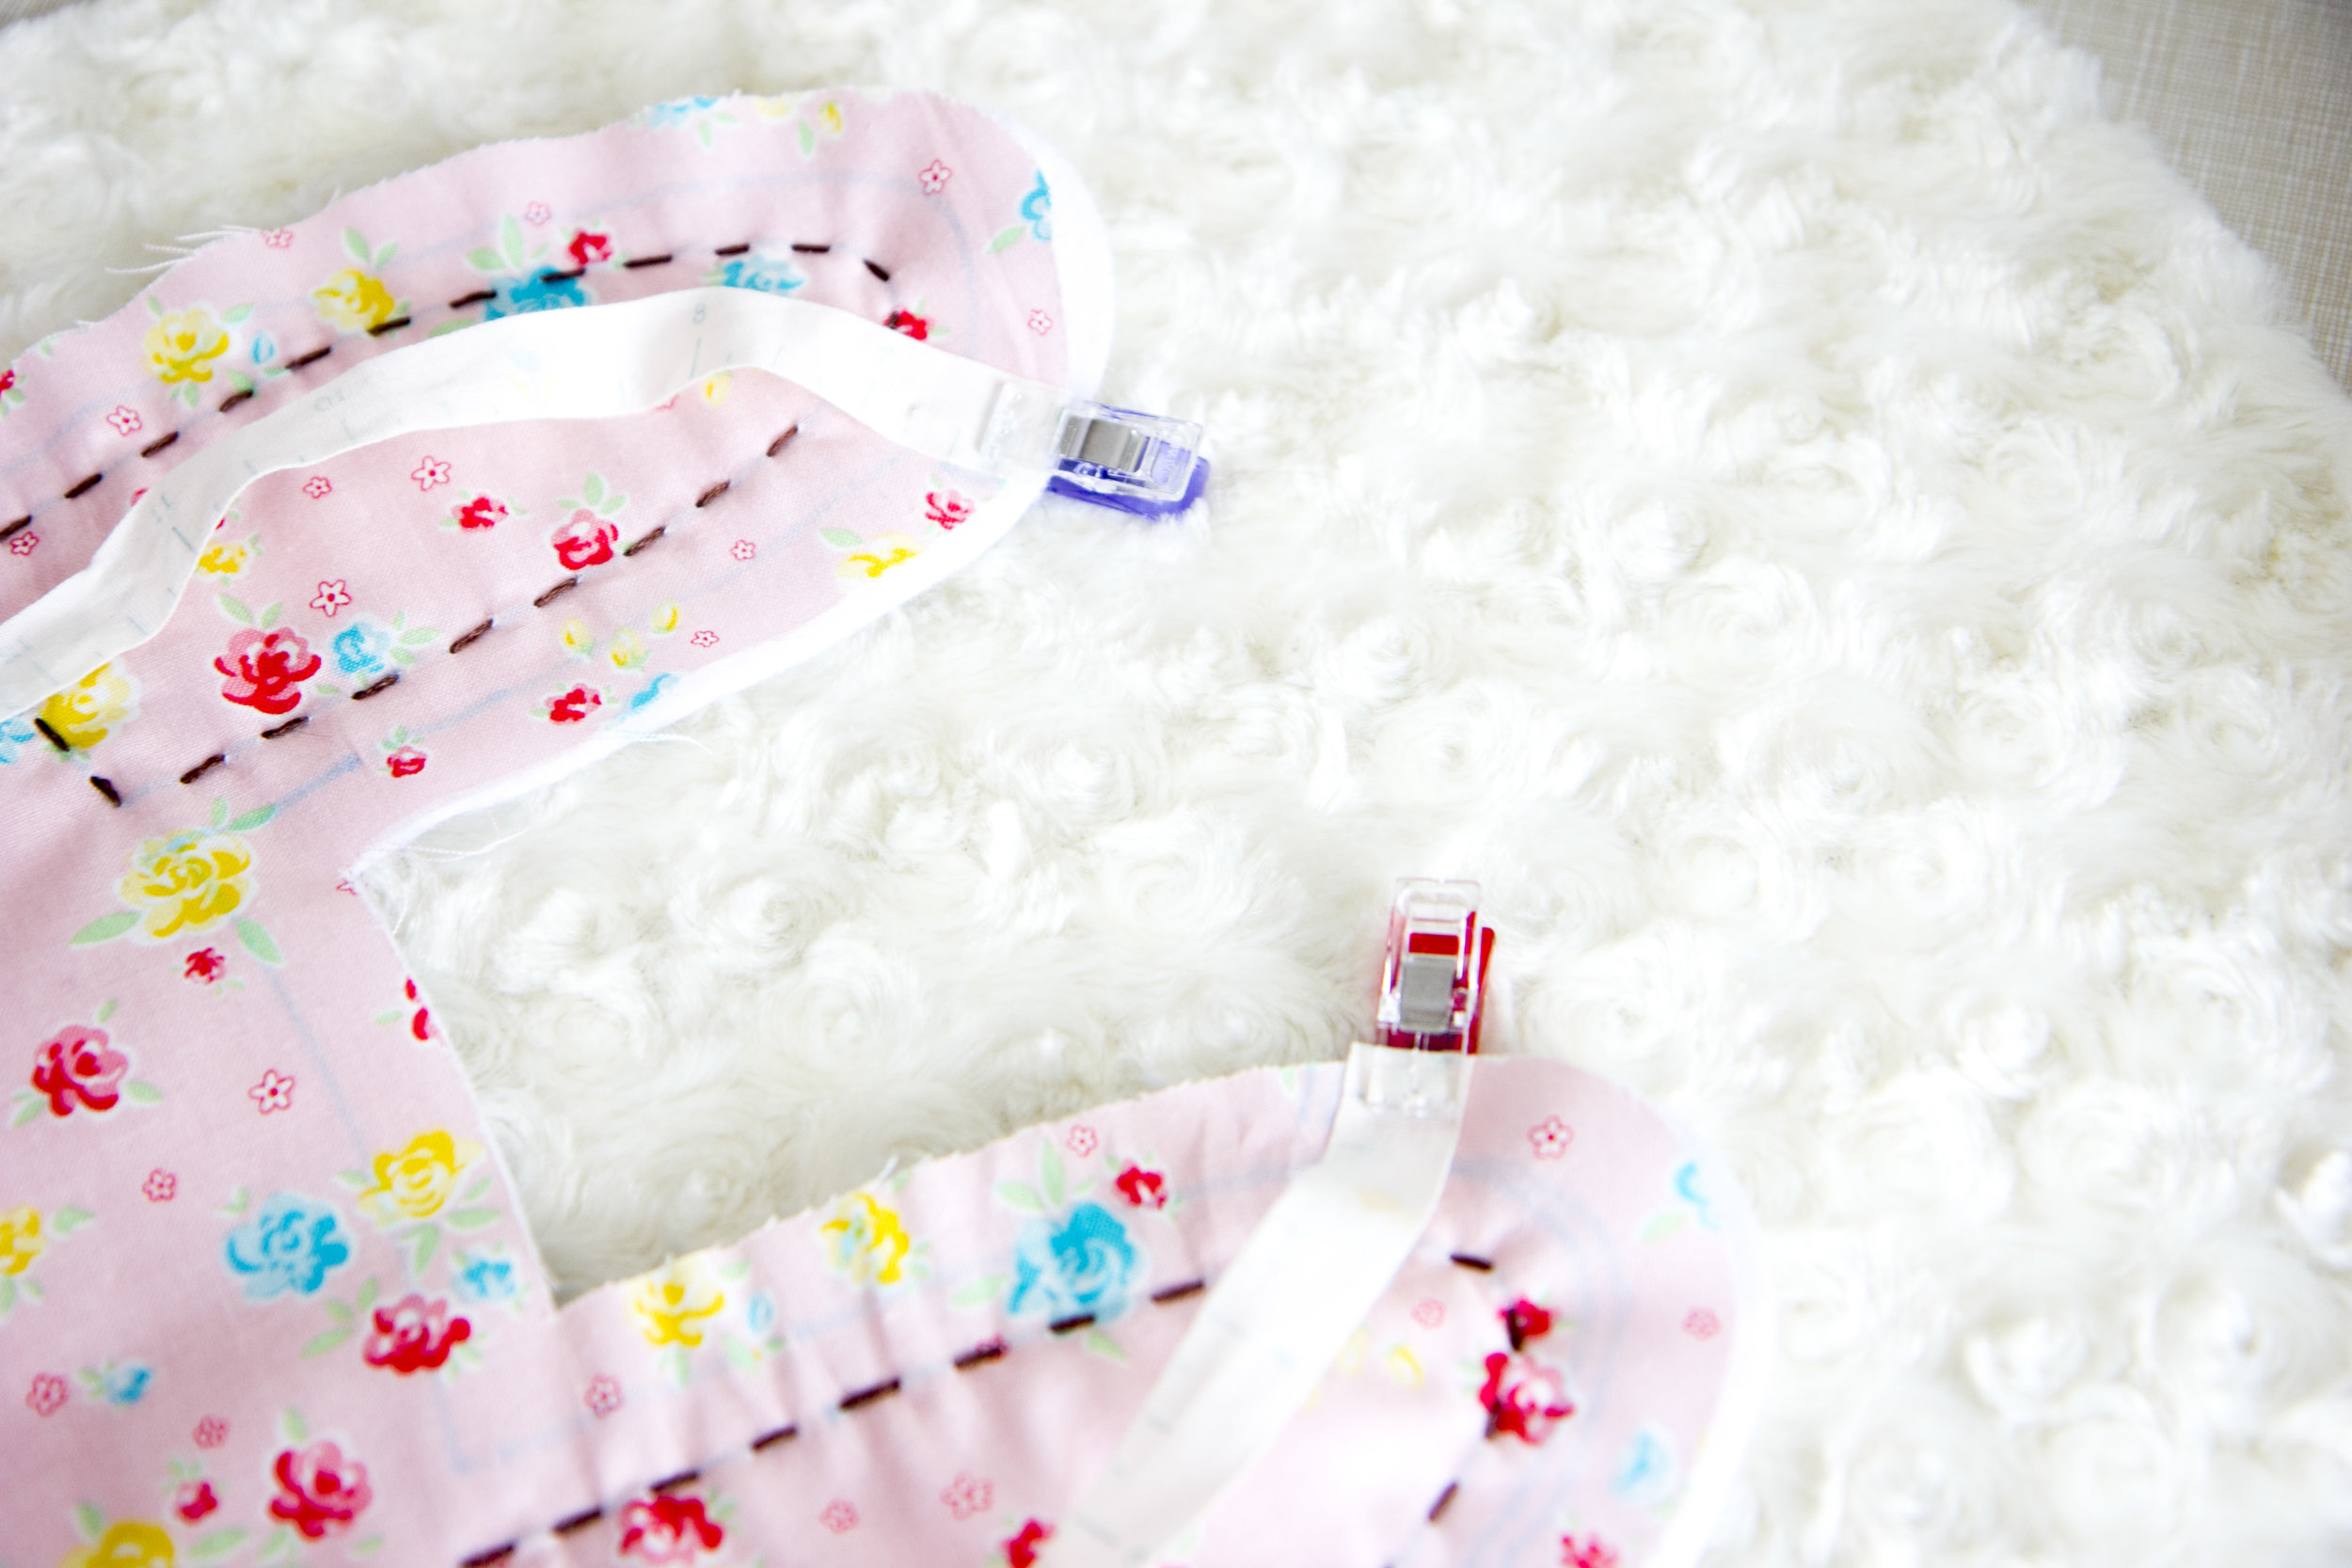
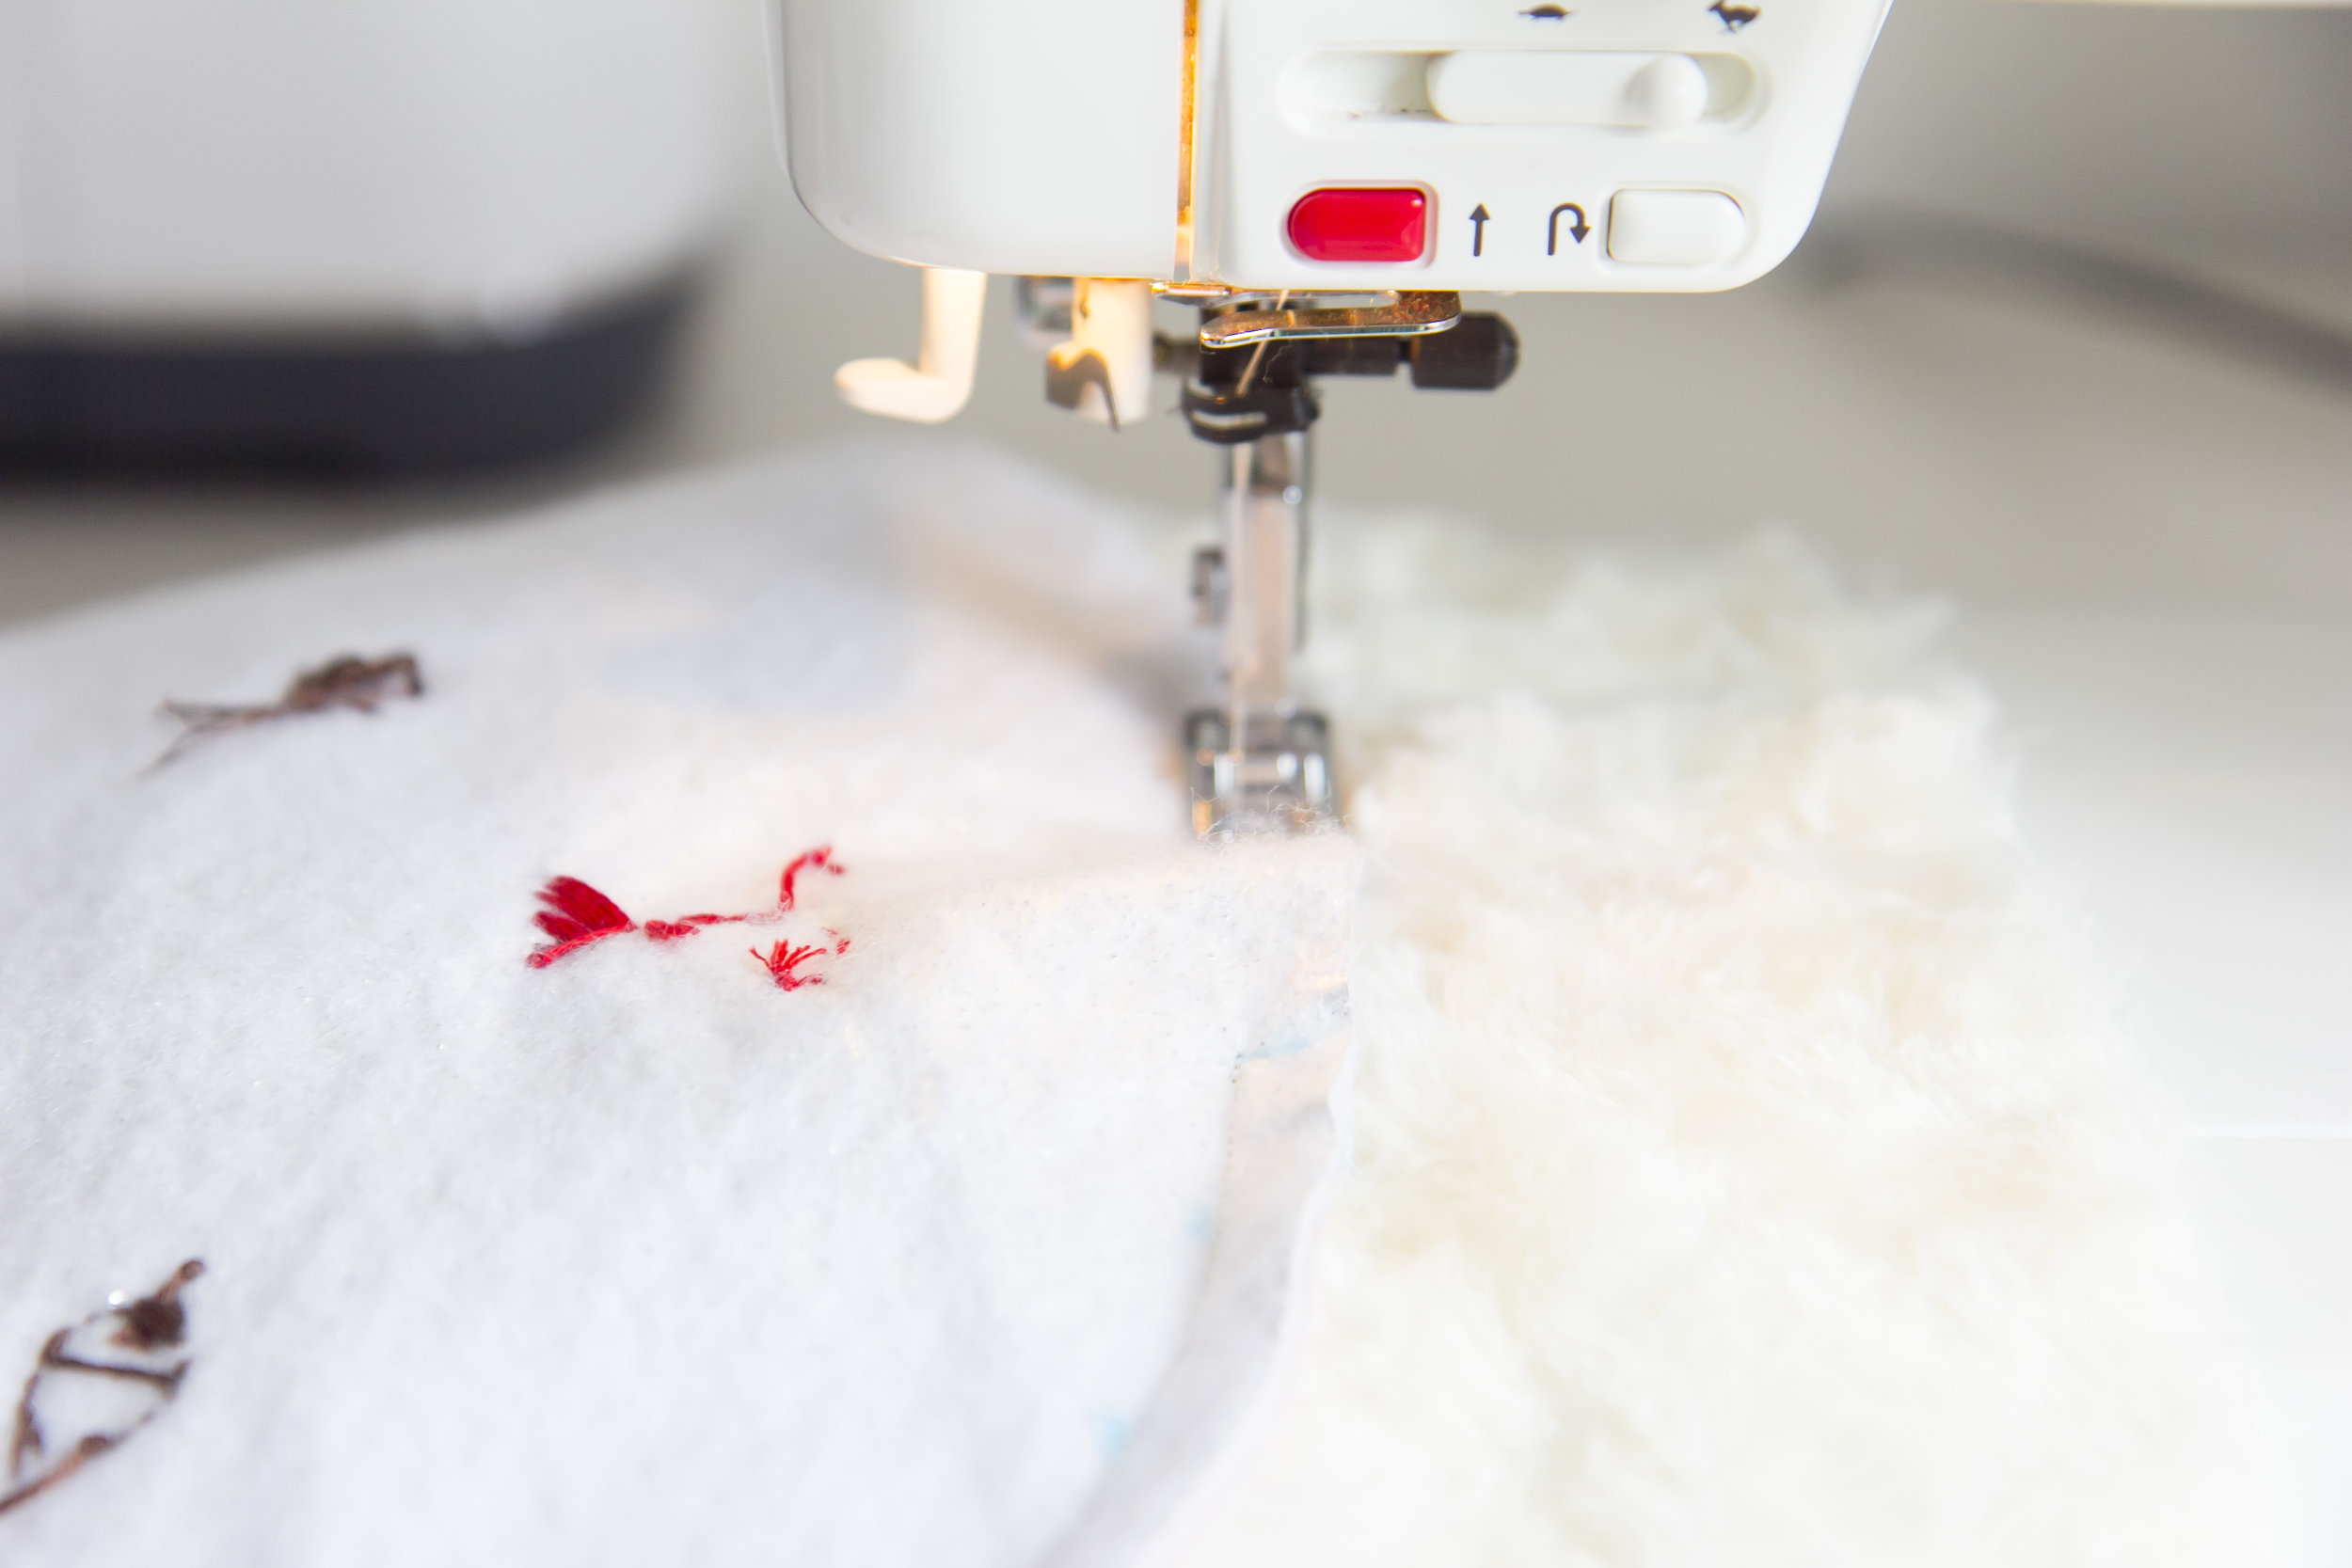
Place the cotton fabric on top of the batting, you can use spray baste or use pins to keep it together. Be sure that the pre-marked hem line on the batting is on the back and not covered up by the cotton piece. Embroider the face and ears on. You can go to the original tutorial from here to find the rest of the directions. =)
VIEW ORIGINAL TUTORIAL DIRECTIONS


All embroidered.


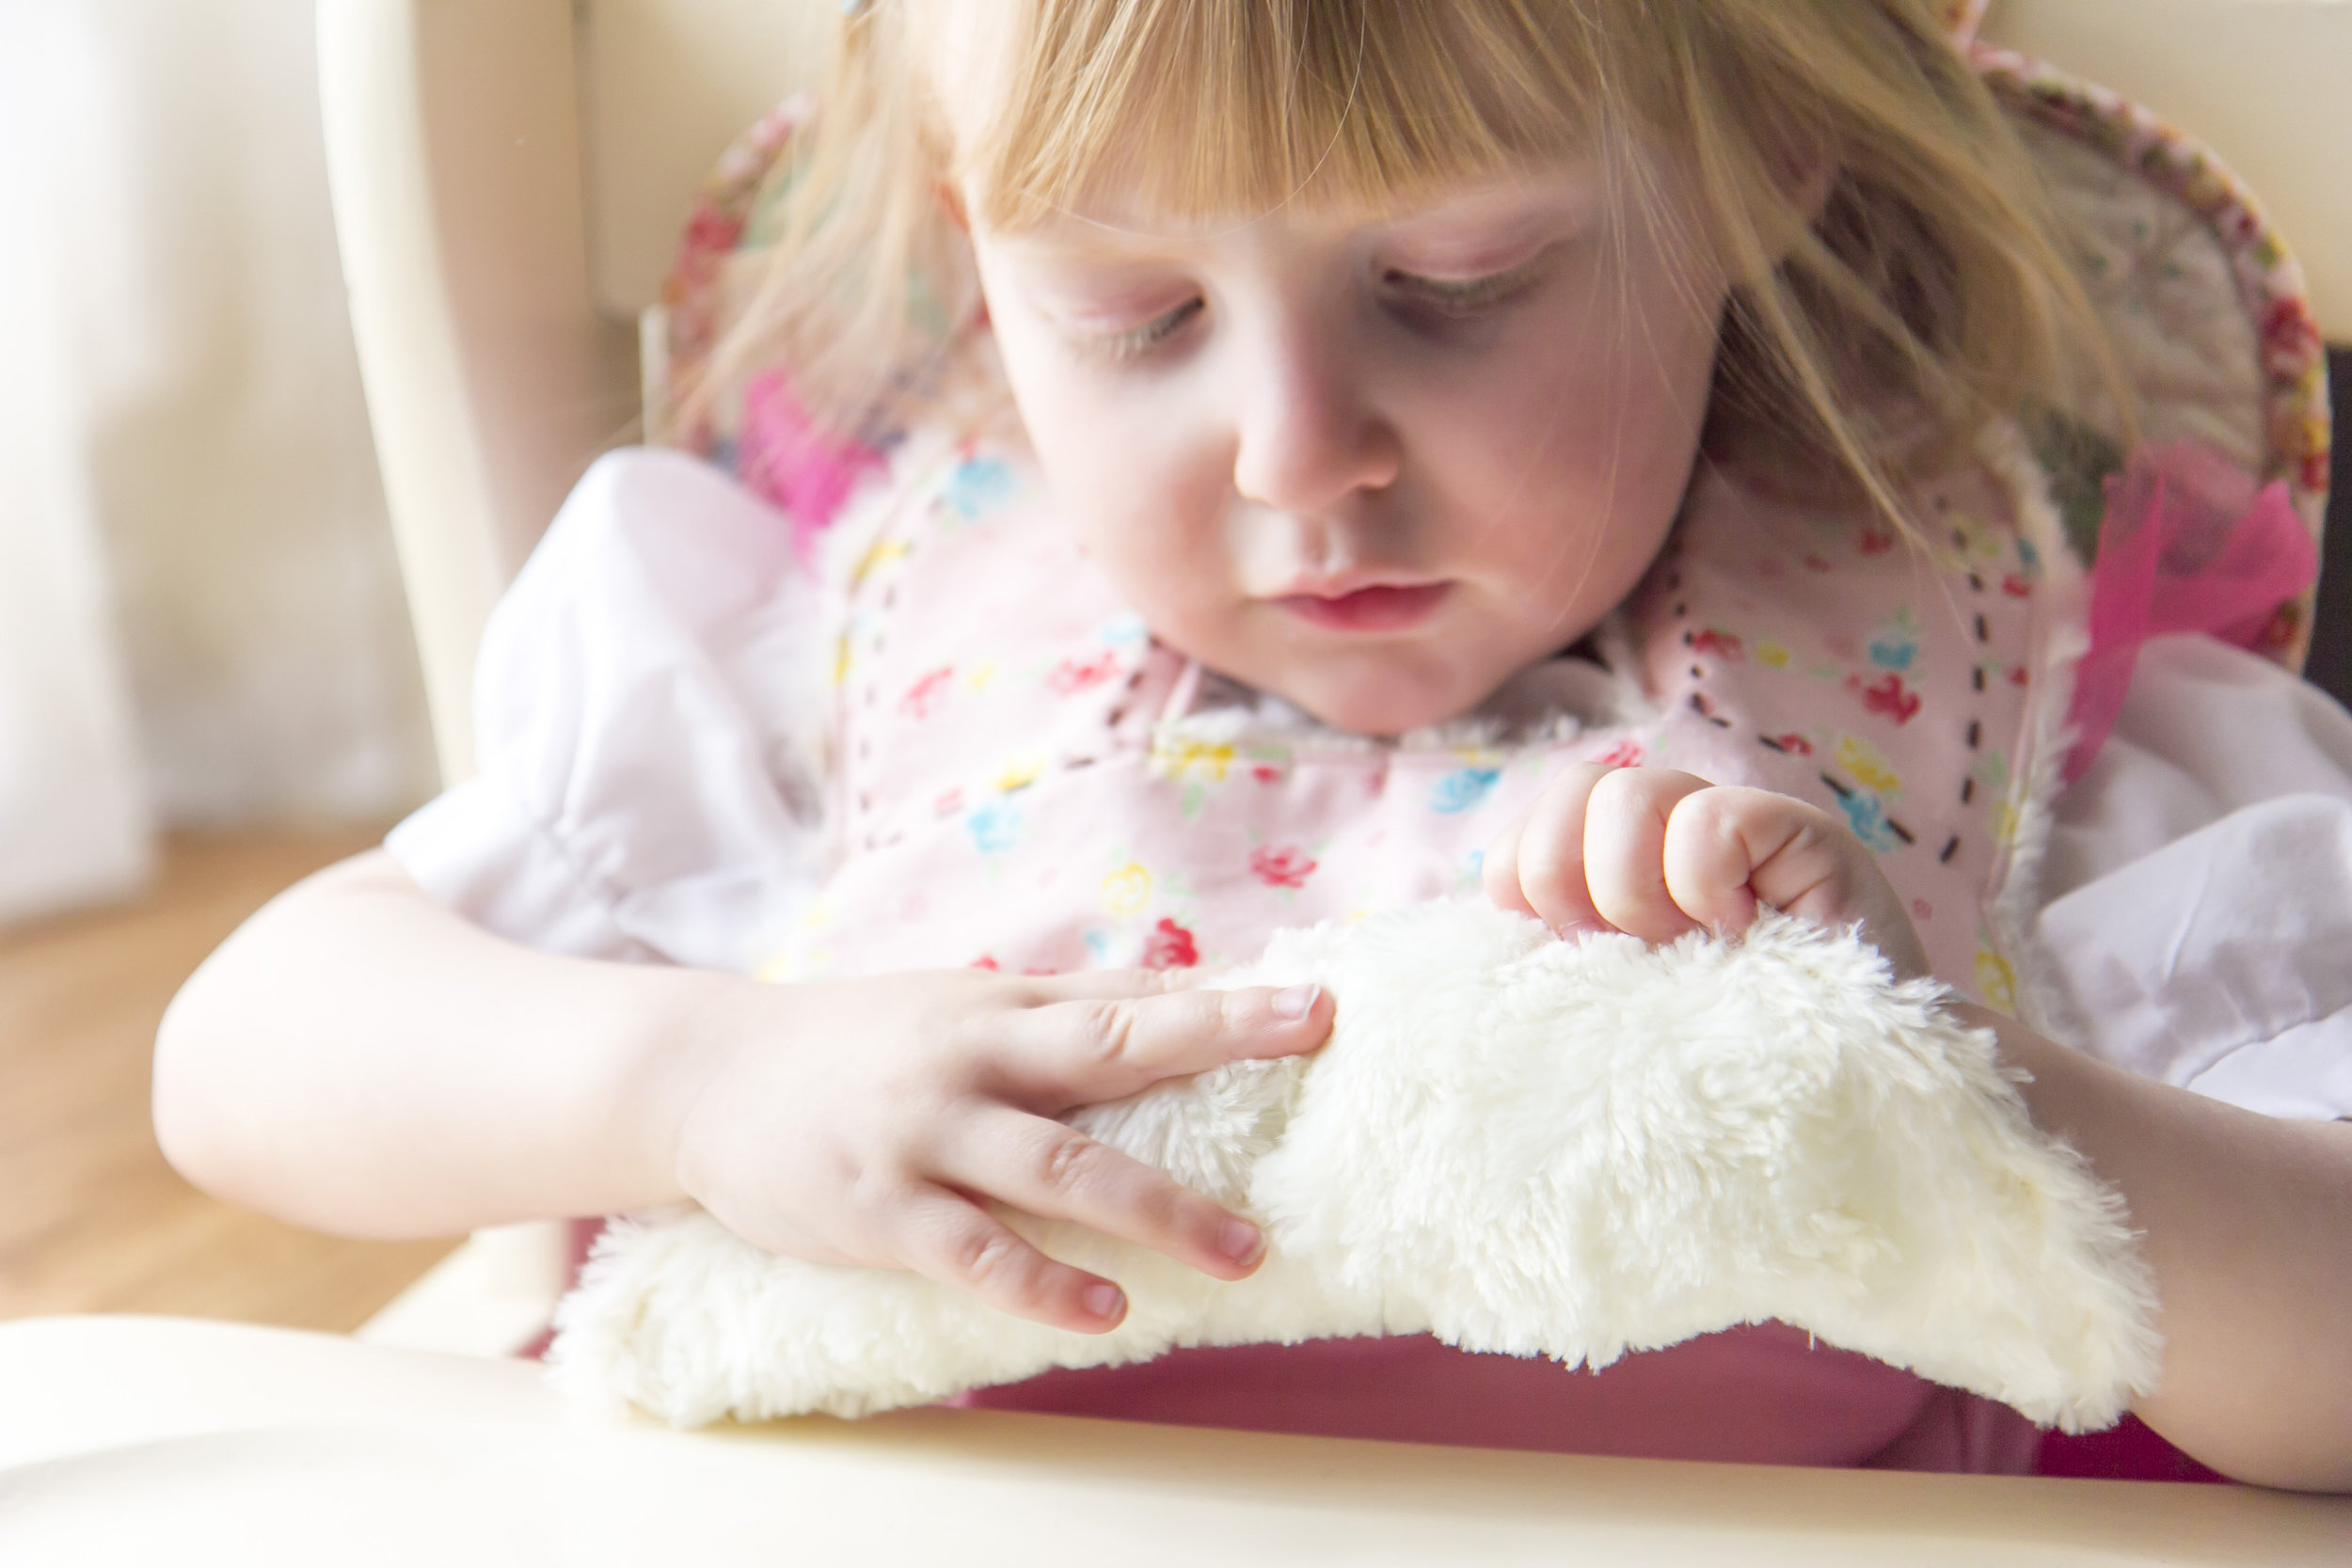

Bunny bibs galore! I love using a soft chenille or minky fabric for the back. It stays soft even after washing it many times. =) I hope this tutorial was helpful!
Always,

